

“Safety Graphics were a pleasure to work with and provided fast results for an important safety issue. Thank You Leigh.”
Jarod Gilchrist – Co-Owner
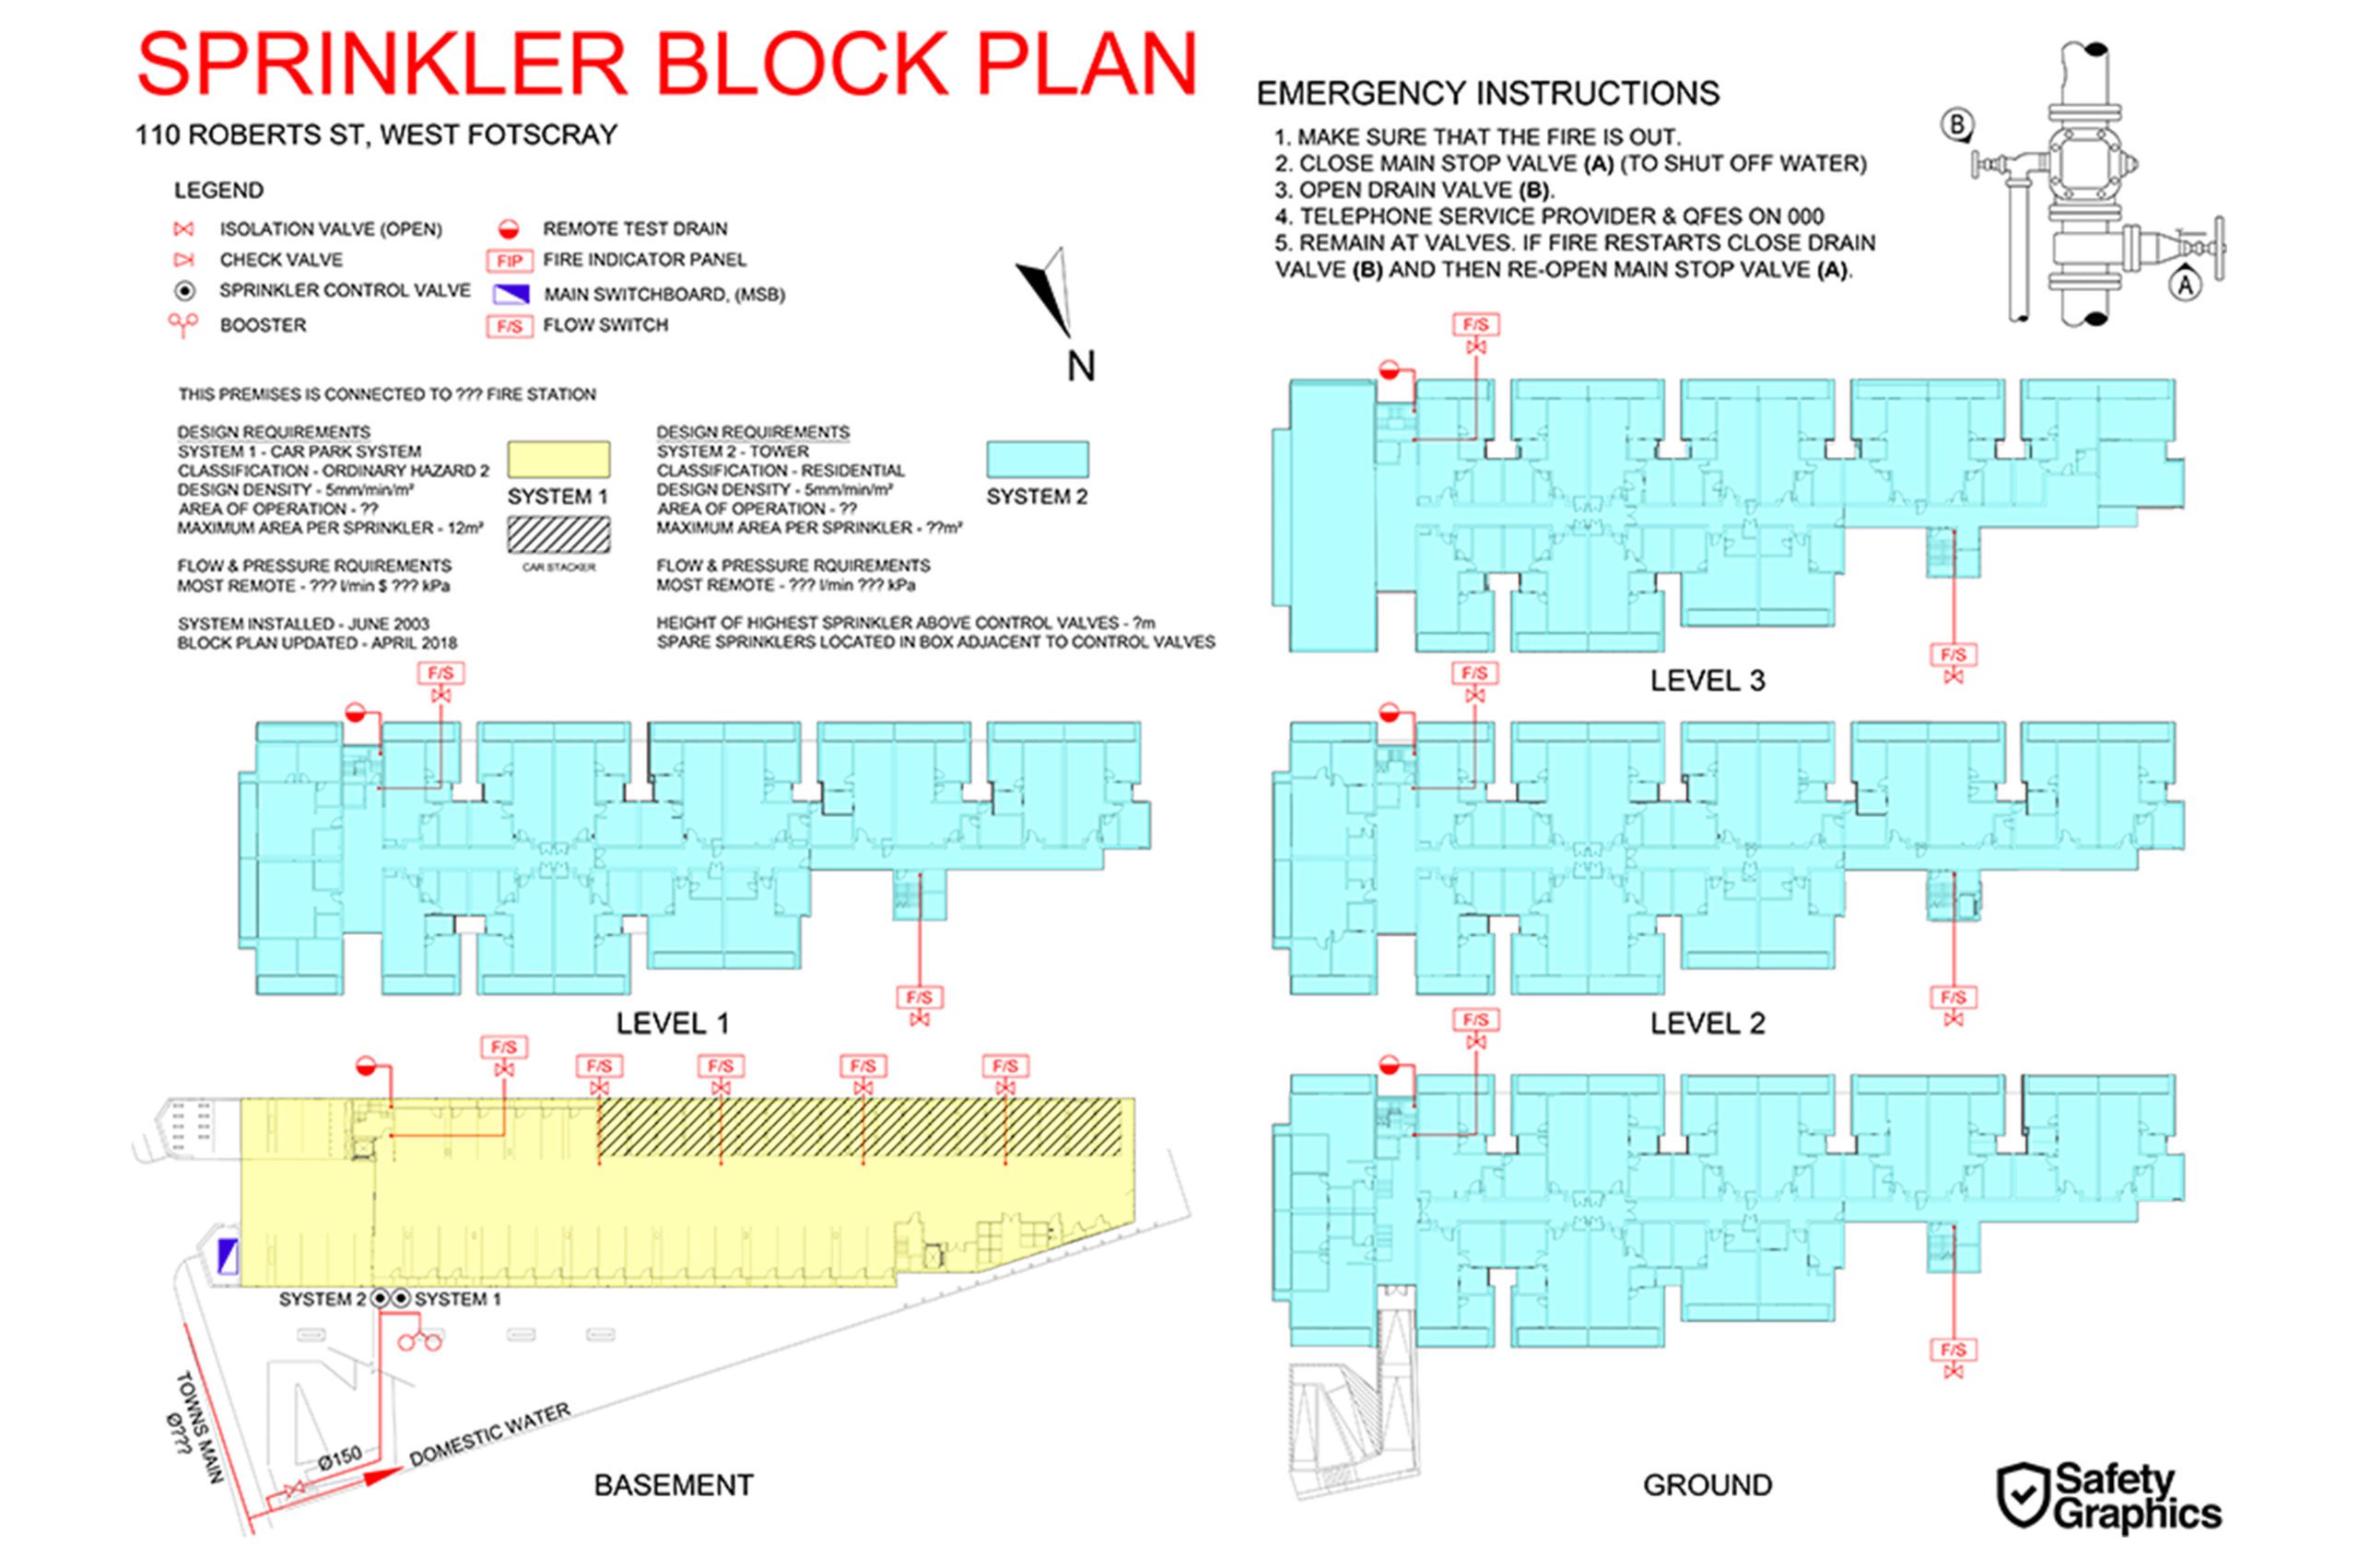
Block Plans
Safety Graphics can help ensure that your location and facilities are fully compliant.
Industry Membership:

Does your business, strata or facility fully comply with WH&S and AS3745:2010?

WH&S Regulations

Compliance

Cost Effective

Delivery
Evacuation Diagram Sample

Office
/ Retail
From lock-up shops to entire shopping centres, small offices to multi-level high rise offices, we cater to all.
Safety Compliance Group ensures all diagrams, plans, flip charts, testing, maintenance and certifications are carried out in accordance with Australian Standards and Regulations.

Hospital
/ Health
Public and private health facilities and clinics, hospitals and day surgery sites.
Safety Compliance Group ensures all diagrams, plans, flip charts, testing, maintenance and certifications are carried out in accordance with Australian Standards and Regulations.

Universities
/ Schools
Safety Compliance Group has worked with some of Australia’s top tertiary, secondary and primary schools all over Australia.
Our current client list includes both government and private schools and universities.
Safety Compliance Group ensures all diagrams, plans, flip charts, testing, maintenance and certifications are carried out in accordance with Australian Standards and Regulations.

Childcare
/ Aged Care
Child care and aged care facilities are one of our specialties. Single site or statewide and multi-state facilities are no problem for Safety Compliance Group.
Let us take care of AS3745-2010 and AS4083_2010 emergency evacuations diagrams, emergency procedure guide flip charts, manuals and planning.
Inspect and test, certifications, extinguishers and portables, exit and emergency lighting, AFSS for council and state regulations compliance.
Safety Compliance Group ensures all diagrams, plans, flip charts, testing, maintenance and certifications are carried out in accordance with Australian Standards and Regulations.

Warehouse
/ Factories
Manufacturing and processing facilities, storage, distribution, fulfilment or any type of industrial, commercial or storage operations.
Safety Compliance Group ensures all diagrams, plans, flip charts, testing, maintenance and certifications are carried out in accordance with Australian Standards and Regulations.

Residential
/ Hotels
Our teams are experienced delivering fully compliant products and services to the accommodation sector.
We work with Short Term Rental Accommodation (STRA) such as AirBNB and other holiday rental operators as well as motels, resorts and pubs and hotel brands.
Likewise, with residential, we work with some of the biggest residential developers as well as boutique property builders throughout the country.
Strata and real estate property managers and owner/managers.
Safety Compliance Group ensures all diagrams, plans, flip charts, testing, maintenance and certifications are carried out in accordance with Australian Standards and Regulations.

Experienced with all types of buildings and facilities

Cost effective and competitive pricing

Fast turnaround from 48 hours for urgent jobs

Specialising in AS3745:2010 & AS4083:2010

National coverage - servicing all states & territories

Our experts carry out site visits, surveys and installations.
“Best looking Evacuation diagram ever was created by Safety Graphics. Also process was so simple and fast. Thank you.”
Jerry Cho – Franchisee
“The process of updating our evacuation plans through various stages of redevelopment was made simple with the guidance and professionalism of Leigh. A quick turnaround time was needed and Safety Graphics exceeded our expectations. We will continue to use Safety Graphics in any future needs and I have no hesitation in recommending them.”
Steve Brady, Facilities Manager
“We recommend Safety Graphics to anyone that requires expert advice and quality workmanship, their customer service and attention to detail is excellent. Safety Graphics is one of the most cost effective companies on the market.”
Craig Benedick – Senior Safety and Wellbeing Advisor